
Smyrna Wood Flooring builds and refinishes hardwood stairs in Smyrna, GA, drawing on more than 20 years of wood floor work, serving surrounding cities including Vinings, Fair Oaks, Mableton, Marietta and Austell. We sand and refinish worn treads, replace the ones that are past saving, and convert carpeted stairs into finished wood, and we quote every step on its own so you can see exactly what you are paying for.
Stairs are the hardest part of any wood floor job. Each tread has a flat surface, a nosing that takes the most wear, and edges against a stringer or a wall that no large sander can reach, so most of the work is done by hand. That is why stairs get their own quote rather than a line item at the bottom of a floor estimate.
We also price refinishing and new treads as the two different jobs they are. Refinishing keeps the treads you have and restores their surface, while replacement puts in new wood where the old treads are damaged or were never meant to be seen. Knowing which one each step needs keeps you from paying for replacement where a refinish would do.
Refinishing Existing Hardwood Stairs
Hand Sanding Treads and Nosing
On most staircases, the only machine that fits on a tread is a small orbital or detail sander, and the corners are finished with scrapers and hand sanding. The stair nosing, the rounded front edge of each tread, takes the heaviest wear and usually needs the most attention.
We sand each tread through a full grit sequence, working with the grain to avoid swirl marks that show under stain. Taking the time here is what separates stairs that look refinished from stairs that simply look recoated.
Wear Patterns and Worn Nosing
Stairs wear in a predictable pattern: the center of each tread and the front of the nosing lose finish first, then wood. On treads that have been refinished before, that wear can be deep enough that sanding it out would thin the tread too much.
We measure the treads before quoting a refinish. When one or two treads are worn past saving, we replace only those and refinish the rest, blending the color so the new treads do not stand out.
Stain and Finish for High-Traffic Stairs
Stairs take more concentrated wear than any floor, so the finish matters even more. We usually recommend a durable waterborne polyurethane in a satin sheen level, which stays clear, dries fast enough to keep the stairs usable, and is less slippery than gloss.
Stain samples are laid on the sanded treads so you see the color on the actual wood. When the stairs meet a hardwood landing or hallway, we blend the two so the transition reads as one surface.
Converting Carpeted Stairs to Wood
What Is Under the Carpet
In most homes, the treads under stair carpet are construction-grade lumber or plywood, built only to support padding and carpet. They often have gaps at the skirt board, fastener holes and edges cut for a carpet overhang rather than a finished nosing.
Those treads cannot be refinished into something you would want to see, so a conversion almost always means new treads. We lift a corner of carpet during the visit so you know exactly what you have before deciding.
New Treads, Risers and Nosing
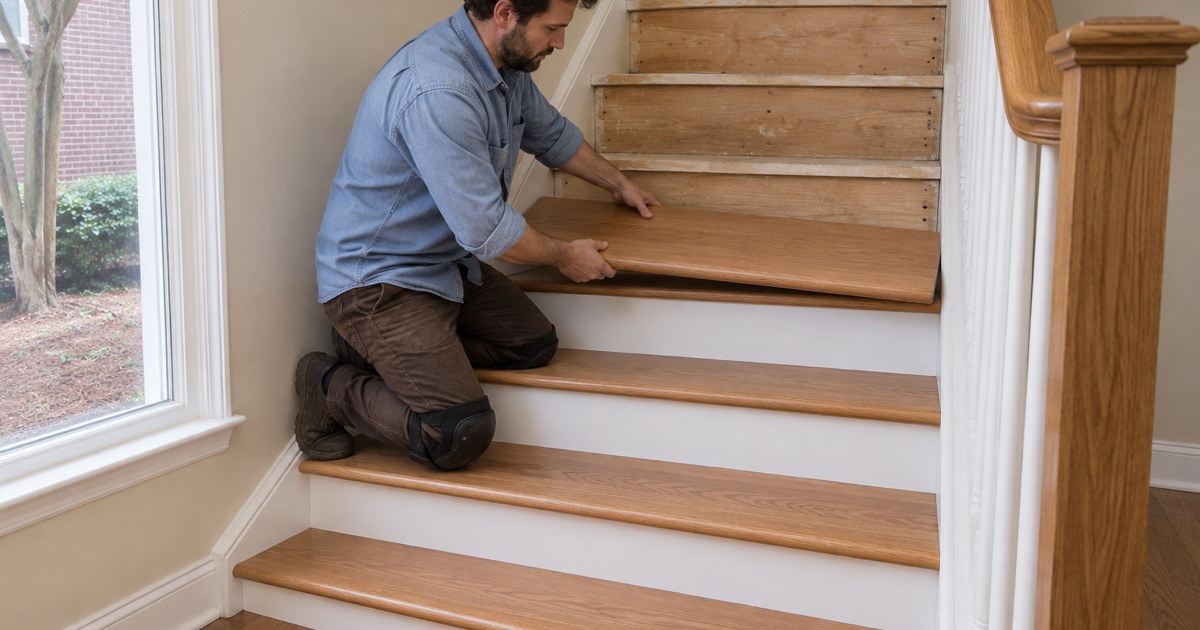
A conversion replaces each rough tread with a new hardwood tread, adds a finished riser behind it, and gives each step a proper stair nosing. The treads are cut and fitted one at a time, since no two steps on a site-built staircase are exactly the same width.
We match tread species to your floor, or choose a contrasting wood if you prefer. Risers can be stained to match or painted, which hides scuffs and makes each step easier to see.
Tack Strip, Staples and Carpet Removal
Removing stair carpet leaves behind tack strip, carpet pad remnants and dozens of staples on every step. All of it has to come out cleanly before new treads go on, or the fasteners will telegraph through or keep the new wood from sitting flat.
We remove it all and check each stair for squeaks and loose framing while the steps are bare. Fixing a squeak now takes minutes; fixing it after new treads are glued down means lifting them again.
Stairs in Townhomes, Condos and Older Homes
Townhome Stairs and Association Rules
Many townhomes have their main stairs carpeted by the builder, and converting them is one of the most requested jobs we see. Any rules on interior flooring come from your own declaration, not state law, so we confirm the association’s written approval before starting.
In stacked units where noise carries, we also check whether the declaration says anything about hard surfaces or underlayment, since stairs carry footfall noise too. A stair that shares a wall with a neighbor can be quieter with treads glued as well as fastened, and we plan for that when the declaration raises it.
Stairs in Older Homes
Older homes often have real hardwood treads under paint or carpet. Painted treads in a home built before 1978 are checked for lead before any sanding, and old shellac or wax finishes are tested so the new finish bonds.
When the original treads are sound, refinishing them keeps the character of the house. Where a tread has split or been cut for carpet, we replace it with matched wood rather than a mismatched modern board.
Landings and Hallways
The landing at the top or middle of a flight is often part of the floor rather than the stair. We finish it with the stairs so the stain and sheen match from the first step to the hallway beyond.
Where a new hardwood tread meets an existing floor, we install a matching nosing or reducer at the transition. That edge is where a poor stair job shows first, so we treat it with the same care as the treads.
Our Step-by-Step Hardwood Stairs Process
Step 1: Inspect and Quote Tread by Tread
We look at every step, lift carpet where needed, measure tread thickness and wear, and note squeaks and loose framing. The written quote lists each step and whether it gets refinished or replaced, so a staircase with three worn treads is not priced as if all fourteen needed new wood.
Step 2: Prepare the Staircase
Carpet, pad, tack strip and staples come out, loose treads are secured and squeaks are fixed while the framing is exposed. The stairwell is masked to protect walls, skirt boards and handrails from dust and stain, and we set up dust extraction at the bottom of the flight.
Step 3: Sand or Install
Treads that are staying are hand sanded through a full grit sequence, with the nosing shaped back to a clean profile. New treads, risers and nosing are cut, fitted and fastened one step at a time, scribed to the walls and stringers so the gaps stay tight.
Step 4: Stain and Finish in Stages
Stain and finish are applied in stages, often alternating steps, so you can still use the stairs while coats dry. We finish with a satin or matte sheen for grip and walk you through cure times before we leave. Runners or rugs should wait until the finish has fully cured, usually a couple of weeks, so they do not mark or trap the finish underneath while it hardens.
- 20+ Years on Wood Floors
- Moisture Readings Before Repairs
- Stain Samples on Your Floor